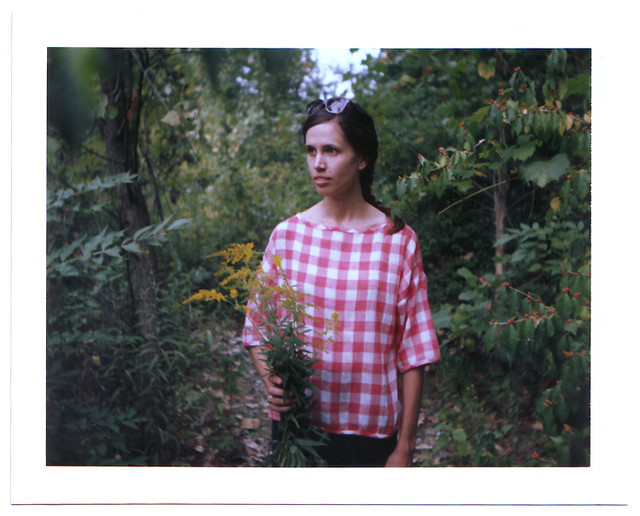
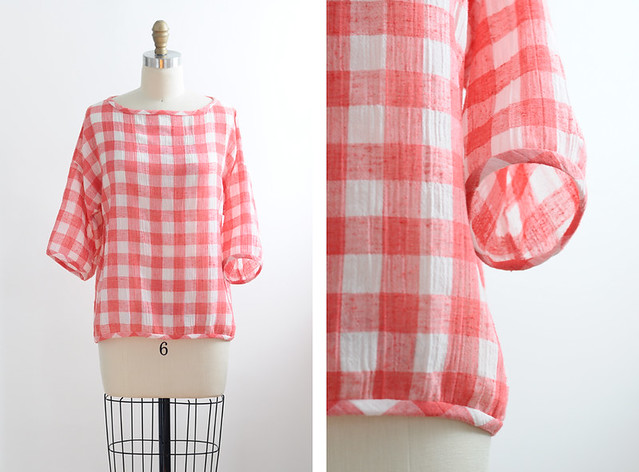
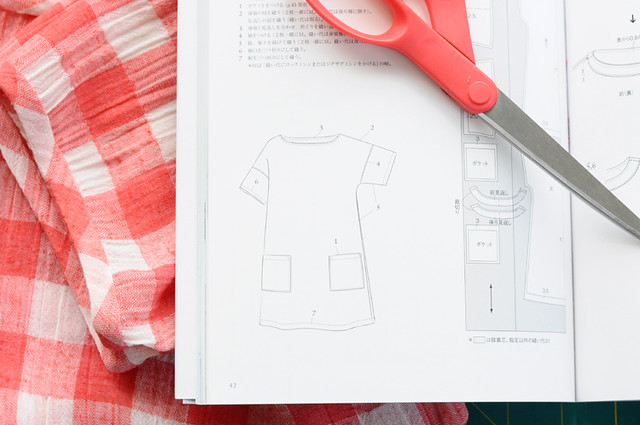
i'd been wanting to make myself a garment out of this vintage gauzy gingham for a while. i like how the lightness and crinkles take the edge off the big, bold pattern. went for simple and boxy... starting with pattern D from
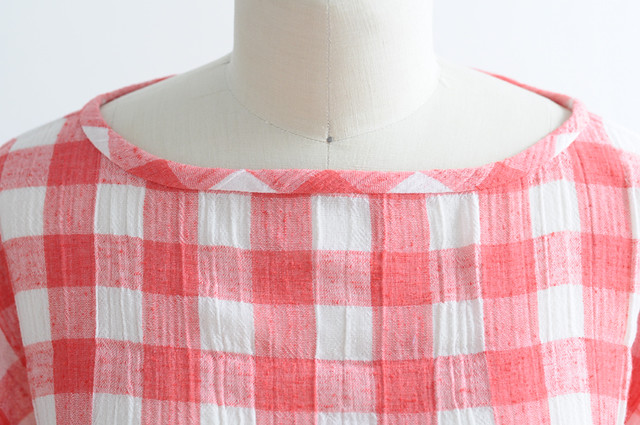
japanese stylish dress book vol. 2, i shortened the body quite a bit and lengthened the sleeves a couple inches. i finished the neck with bias binding instead of a facing and liked how that looked so much that i did the same on the sleeves and hem. i cut the hem binding strips shorter than i normally would and stretched them to the max while attaching. this pulled in and almost gathered the edges, giving the top a softer shape. i'm really happy with how it turned out!
(this first photo is one david shot with our polaroid land camera while we were out exploring).


Just stumbled across your blog, and oh my word. Marie, i love it. Looking forward to following along on your adventures!
ReplyDeleteawww, thanks so much! your comment made my day. :-)
ReplyDeleteSO pretty, Marie! The fabric is just the right mix of feminine and bold. I really like the tightened binding you did at the bottom; it adds interest but doesn't have the thick band/gathered look I loathe so much.
ReplyDeletelovely top - your fabric is beautiful.
ReplyDeletethanks, Emily! for a while i thought i'd have to use this fabric for curtains or something, because of the big checks... but i'm glad i went for it with this top. :-)
ReplyDeletethanks so much! this fabric was quite a lucky find. :-)
ReplyDeleteI love the way you have used self binding. It adds so much to the pattern and really makes it. I've just made this pattern out of an old table cloth. I'm pleased with mine, very pleased ,but I like your version more.
ReplyDeleteaw, thanks! i like that we both chose gingham for this pattern... yours makes me want to try a longer version. :-)
ReplyDeletedid you attached the binding by hand? you can't see stitches there it looks so nice and professional, you just made me take this book out and trace this pattern! Well done!
ReplyDeletethanks, Patty! for the binding, i attached the strip flat, right sides together, then wrapped it around the seam allowance and slip-stitched it in place by hand. good luck with your top! i've been meaning to use this pattern again. :-)
ReplyDeleteHi I just stumbled on your blog and I love your version of pattern D. Would you mind letting me know the amount of fabric you ending up using? thanks!
ReplyDeletethanks, Carol! hmmm... i'm not quite sure how much i used. the fabric was 45" wide, so i would guess 1-1.5 yards, with the bias binding and all. hope this helps! :-)
ReplyDeleteThis top turned out really lovely. The shape is great! I think I have this book in my stash, but I have been too intimidated to give it a try. Thanks for the inspiration.
ReplyDeletethanks! i just love a simple, clean design to show off great fabric. have fun sewing. :-)
ReplyDelete